Unit 4:Project Design Implementation and Evaluation - Week 10
I have been making some progress with the level design, mostly within the more technical side of things - I have been doing some research, self-learning and testing.

I became familiar with the Pen tool, within the Geometry Editing tab. This is a tool that allows you to create a polygon based on where you want the vertices to be. It is super useful when you want to create more unorthodox/irregular shapes.
I have been struggling with Maya, since it is quite a complicated software and I have not used it in quite a while, as I mentioned before. I am in the process of relearning it. One of the challenges that I have been facing is finding out the correct way of exporting an object from Unreal into Maya, making adjustments to the object, and then exporting it back to Unreal Engine. It is quite a process, as there are many crucial settings that I am not familiar with.
My work around this was the Pen tool. In the previous post, I showed a windowed wall that I made. However, what I did not mention was how I made it - I tried exporting to Maya and modelling it there, and while that soft of worked I still had trouble exporting it back to Unreal. My alternative was making it in Unreal, which I did, but not with the correct tools, hence it looks wonky.

Finally, the Pen tool allowed me to create this polygon which looks exactly how I wanted it to. The process of making it was very smooth too.
With the main structure of the level complete, I decided to move onto the surroundings. I encountered my first problem, which was a mistake I did at the very start of my journey - The floor and walls of the to-be large warehouse (which contains the levels) were made by using a simple cube and scaling it massively. This means that texturing it isn't going to be easy, since this type of tool doesn't give the user many options to work with in terms of scaling.
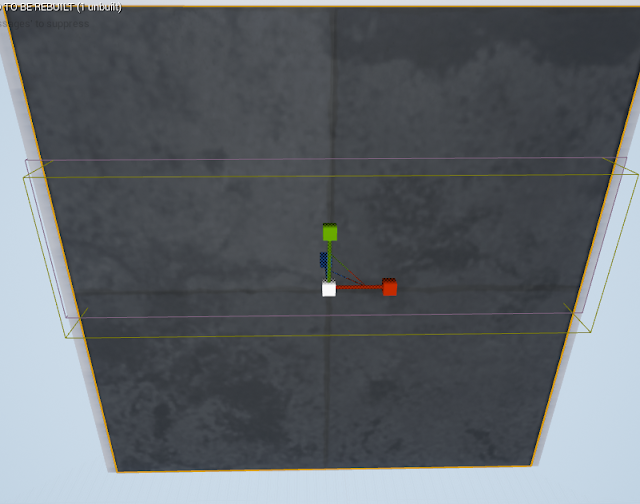
For example, this is one of the walls of the warehouse. As you can see, when you apply the texture it is set to automatically fit the polygon, the cube is huge, the texture will stretch and look terribly low-res.


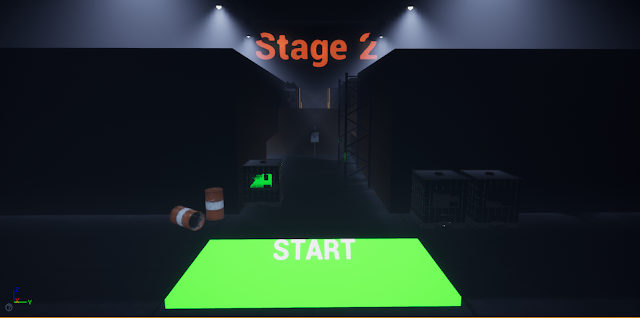
My fix was to apply some of my knowledge from previous situations here. Simply added two scaling parameters to both the Normal map texture sample, and the Base Color texture sample. This means that both the color textures as well as the tile textures could now be scaling accordingly for me to fit them into the huge polygons.

And there we have it, scaled perfectly.

I became familiar with the Pen tool, within the Geometry Editing tab. This is a tool that allows you to create a polygon based on where you want the vertices to be. It is super useful when you want to create more unorthodox/irregular shapes.
I have been struggling with Maya, since it is quite a complicated software and I have not used it in quite a while, as I mentioned before. I am in the process of relearning it. One of the challenges that I have been facing is finding out the correct way of exporting an object from Unreal into Maya, making adjustments to the object, and then exporting it back to Unreal Engine. It is quite a process, as there are many crucial settings that I am not familiar with.
My work around this was the Pen tool. In the previous post, I showed a windowed wall that I made. However, what I did not mention was how I made it - I tried exporting to Maya and modelling it there, and while that soft of worked I still had trouble exporting it back to Unreal. My alternative was making it in Unreal, which I did, but not with the correct tools, hence it looks wonky.

Finally, the Pen tool allowed me to create this polygon which looks exactly how I wanted it to. The process of making it was very smooth too.
With the main structure of the level complete, I decided to move onto the surroundings. I encountered my first problem, which was a mistake I did at the very start of my journey - The floor and walls of the to-be large warehouse (which contains the levels) were made by using a simple cube and scaling it massively. This means that texturing it isn't going to be easy, since this type of tool doesn't give the user many options to work with in terms of scaling.

For example, this is one of the walls of the warehouse. As you can see, when you apply the texture it is set to automatically fit the polygon, the cube is huge, the texture will stretch and look terribly low-res.


My fix was to apply some of my knowledge from previous situations here. Simply added two scaling parameters to both the Normal map texture sample, and the Base Color texture sample. This means that both the color textures as well as the tile textures could now be scaling accordingly for me to fit them into the huge polygons.
 |
| Final Blueprint for this material |
 |
| Parameter scaling slides in the Material Instance that I created. |

And there we have it, scaled perfectly.

Comments
Post a Comment